
One of the hardest things when you are doing the research to buy your first telescope is knowing what to expect and what the key differences are from one model to the other.
Articles online talk about things like aperture, magnification, focal length, and other intimidating numbers that make it look like you need to be a rocket scientist to simply choose a telescope. But what do these numbers translate into in reality? What can you actually expect to see with your eyes?.
Well, for this reason, we have created this article that will give you a visual tour of all the common telescope apertures so you can make an informed decision.
Why is aperture important?
A lot of people will tell you aperture is the most important feature in a telescope. And they are correct.
The entire optical chain that you are going to use (From the telescope to your eyeball) begins with the lens at the front of your telescope, and its diameter, also referred to as the aperture is what’s going to determine how much light is captured and enters the body of your telescope for processing it.
That means the aperture of your telescope is the main bottleneck that determines how good of an image you can actually get to. No matter how fancy or expensive accessories you put on it, if there’s no more light (information) to improve your image, there’s nothing to be done. The aperture determines the upper limit on the quality of the images you’ll see.
On top of that, the aperture will also determine another very important number for stargazing, the maximum useful magnification.
The maximum or highest useful magnification is basically how much your telescope can “zoom” in before the image becomes too blurry and out of focus.
There are two simple rules of thumb that can give you an approximation of the maximum useful magnification that corresponds to a certain aperture. We call it a rule of thumb because the real exact number is going to depend on things like the quality of the manufacturing process of the lens, so it’s really just an approximation. In fact, if you do the math, you will see both formulas don’t really return the same number.
If you have your telescope’s aperture in inches:
Max. Useful Magnification = Aperture x 50
If you have your telescope’s aperture in millimeters
Max. Useful Magnification = Aperture x 2.5
Another practical effect of aperture is to calculate the maximum limiting magnitude your telescope can reach.
The magnitude of a star is a calculation based on its distance from Earth and brightness that determines how “bright” it is in relation to Earth. Because of that, the magnitude is how easy it is to look at a star from Earth and what kind of optical device do you need to observe it.
For comparison, our naked eye can see stars with a magnitude around 5.5 and below (less magnitude = brighter). Even the most basic telescopes can help you see stars with a magnitude of 12. Magnitude is exponential, so the jump from 12 to 13 is bigger than the one from 6 to 7, so the most advanced home telescopes can get to a magnitude around 16.
Telescope Aperture/Magnification/Magnitude Chart
In the following chart we have done all the math for you and calculated both the maximum useful magnification and the limiting magnitude for the most common aperture sizes.
| Aperture | Max. Magnification | Max. Magnitude |
|---|---|---|
| 50mm (1.9″) | 100x | 12.1 |
| 60mm (2.3″) | 120x | 12.47 |
| 70mm (2.7″) | 140x | 12.8 |
| 80mm (3.14″) | 160x | 13.1 |
| 90mm (3.5″) | 180x | 13.35 |
| 100mm (3.9″) | 200x | 13.61 |
| 114mm (4.5″) | 200x | 13.6 |
| 120mm (4.7″) | 240x | 13.97 |
| 130mm (5.1″) | 230x | 13.86 |
| 150mm (5.9″) | 270x | 14.2 |
| 200mm (7.8″) | 360x | 14.83 |
| 250mm (9.8″) | 450x | 15.1 |
| 280mm (11″) | 490x | 15.5 |
| 300mm (11.8″) | 540x | 15.66 |
| 350mm (13.8″) | 620x | 15.96 |
| 400mm (15.7″) | 720x | 16.25 |
If you notice certain irregularities in the scales is because refractor telescopes and Newtonian telescopes have a slight difference when it comes to calculating the max. magnification and certain aperture sizes like 114mm are generally only used for Newtonians. Don’t overthink these numbers too much, again, these are only approximations to understand the capabilities of your telescope. You will rarely find yourself at a point where you need the exact numbers for any real life use cases.
Telescope Aperture Comparison Photos
Let’s get to what you came here for. Here are some photos comparing what different telescopes with a wide range of apertures can do. The photos were all taken under different conditions by different people and with different cameras, so it’s not exactly a controlled experiment, but they should give you an idea of what can you expect to see through the lens of your device.
If you have any pictures that you could share for the aperture ranges that we haven’t included, please feel free to do so using our contact form.
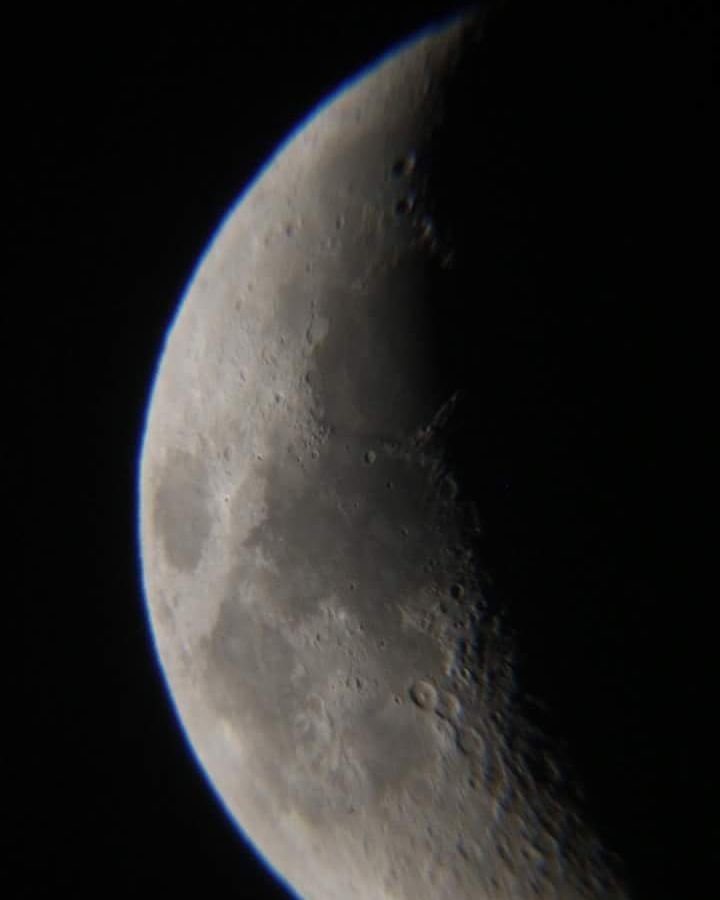
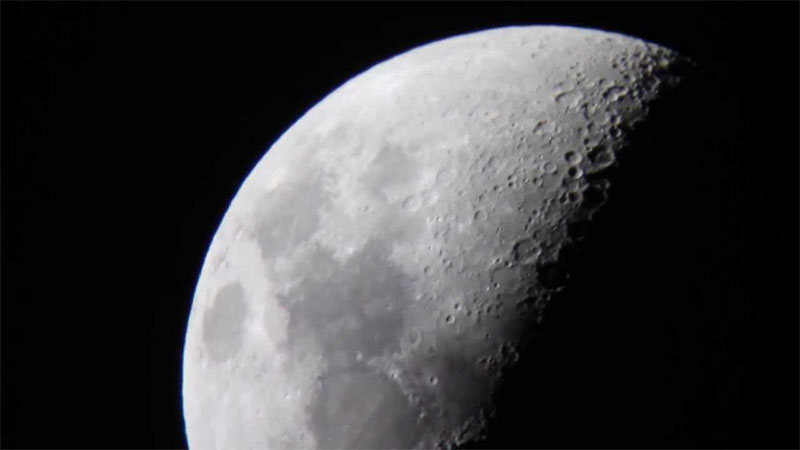
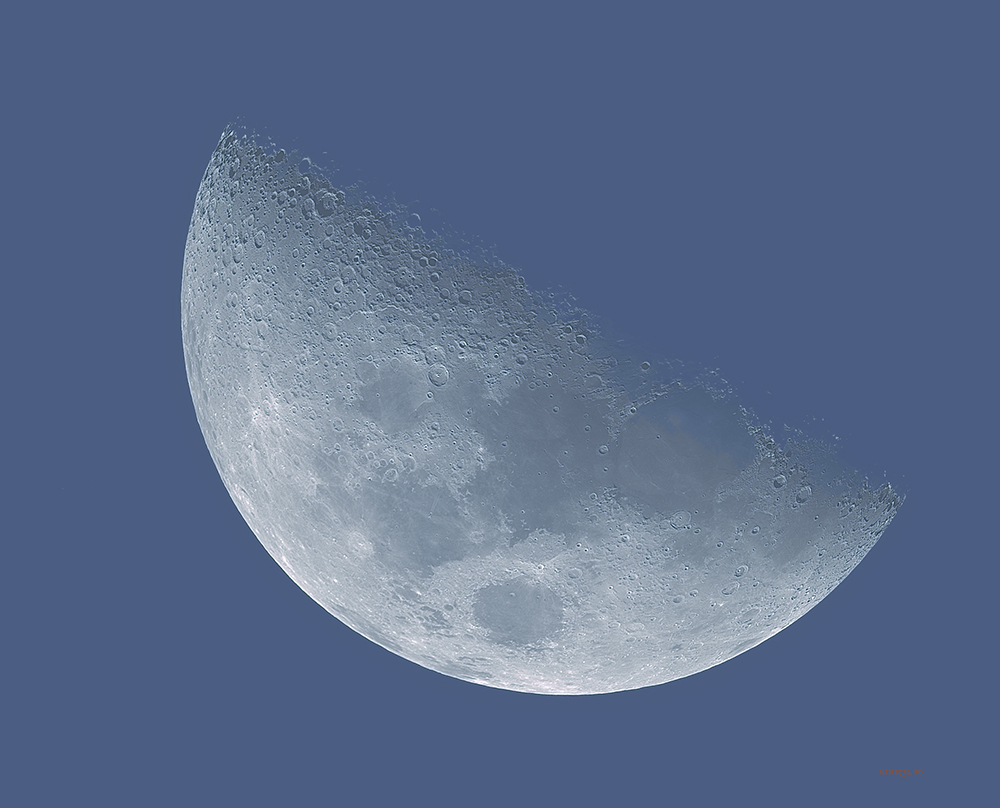
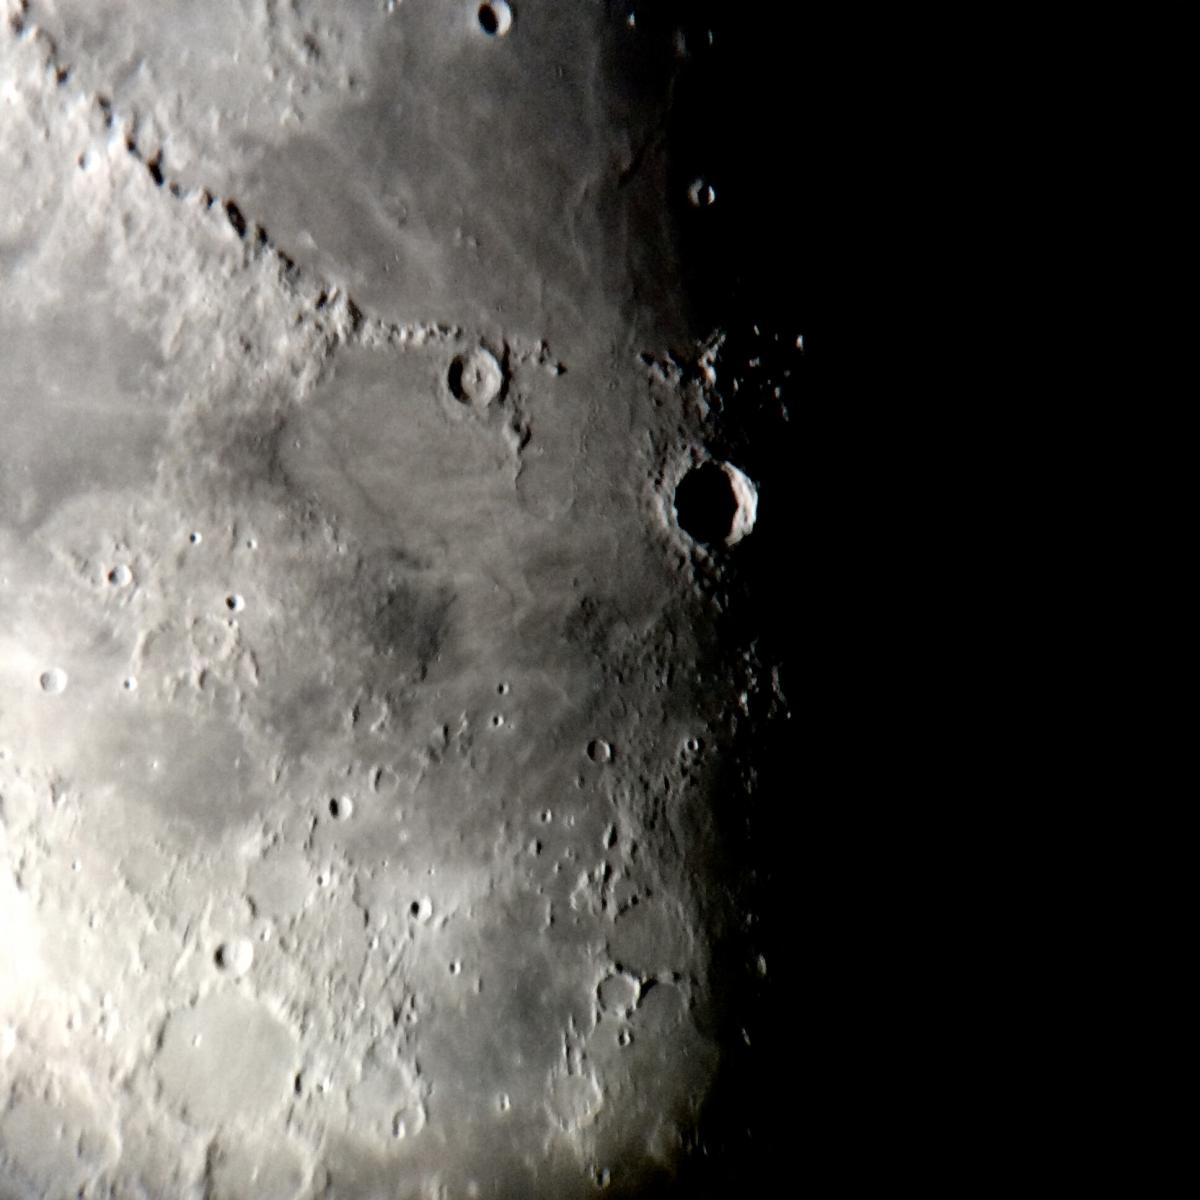
Photos taken with 70mm aperture telescopes
70mm is the minimum we would consider to recommend for an entry-level telescope. Anything below that is basically a toy and you would be better off getting a good pair of binoculars.
With this aperture, the best target to photograph is the Moon as it is hard to get a good shot of even Mars.
Click the photos for larger versions.


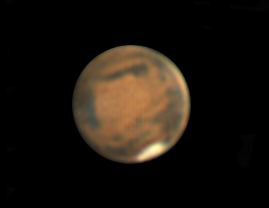
Photos taken with 80mm telescopes
There’s not much difference between 80mm and 70mm telescopes, so as you’ll see, the kind of photos and images you’ll get are only slightly better. Mars starts to gain a bit of detail.
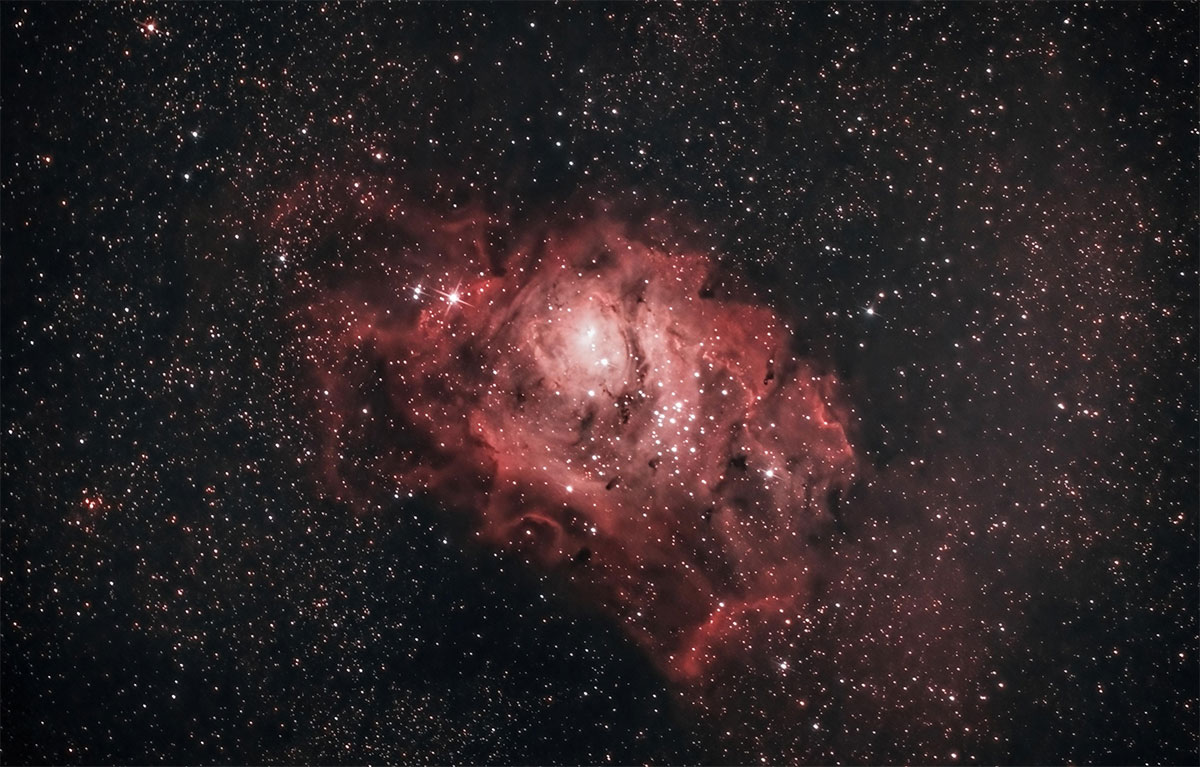
Photos taken with 100mm telescopes
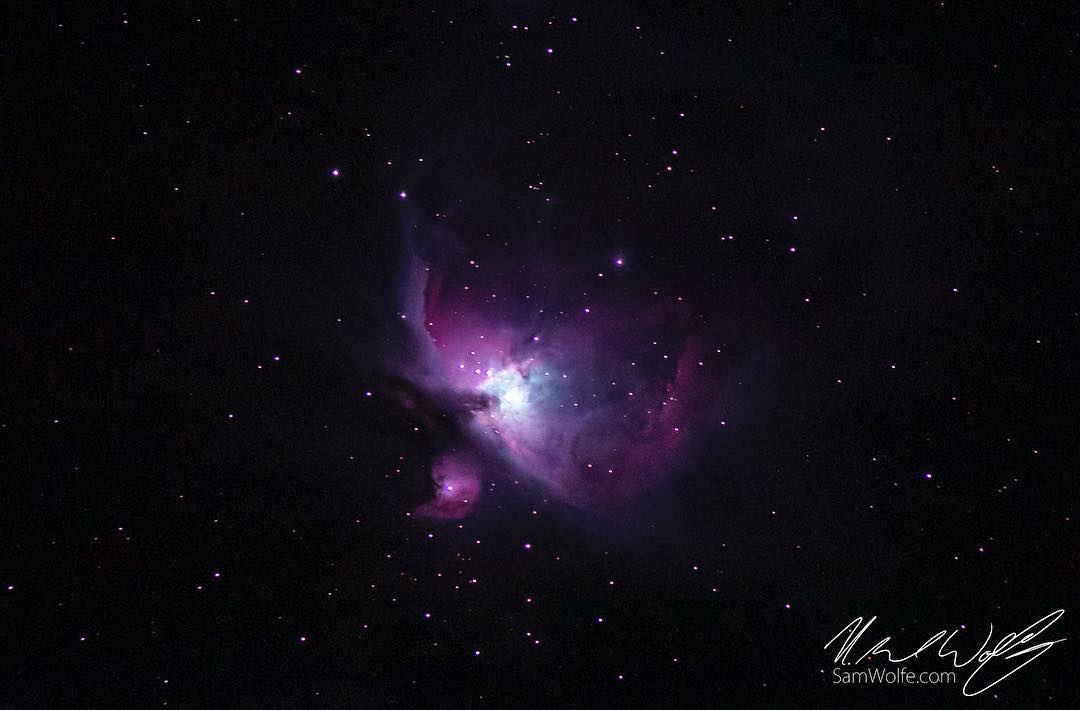
If you want to get into astrophotography, 100mm-114mm is a good aperture to start with. As you can see in the photos below, you can even start to get good photos of nebulas.
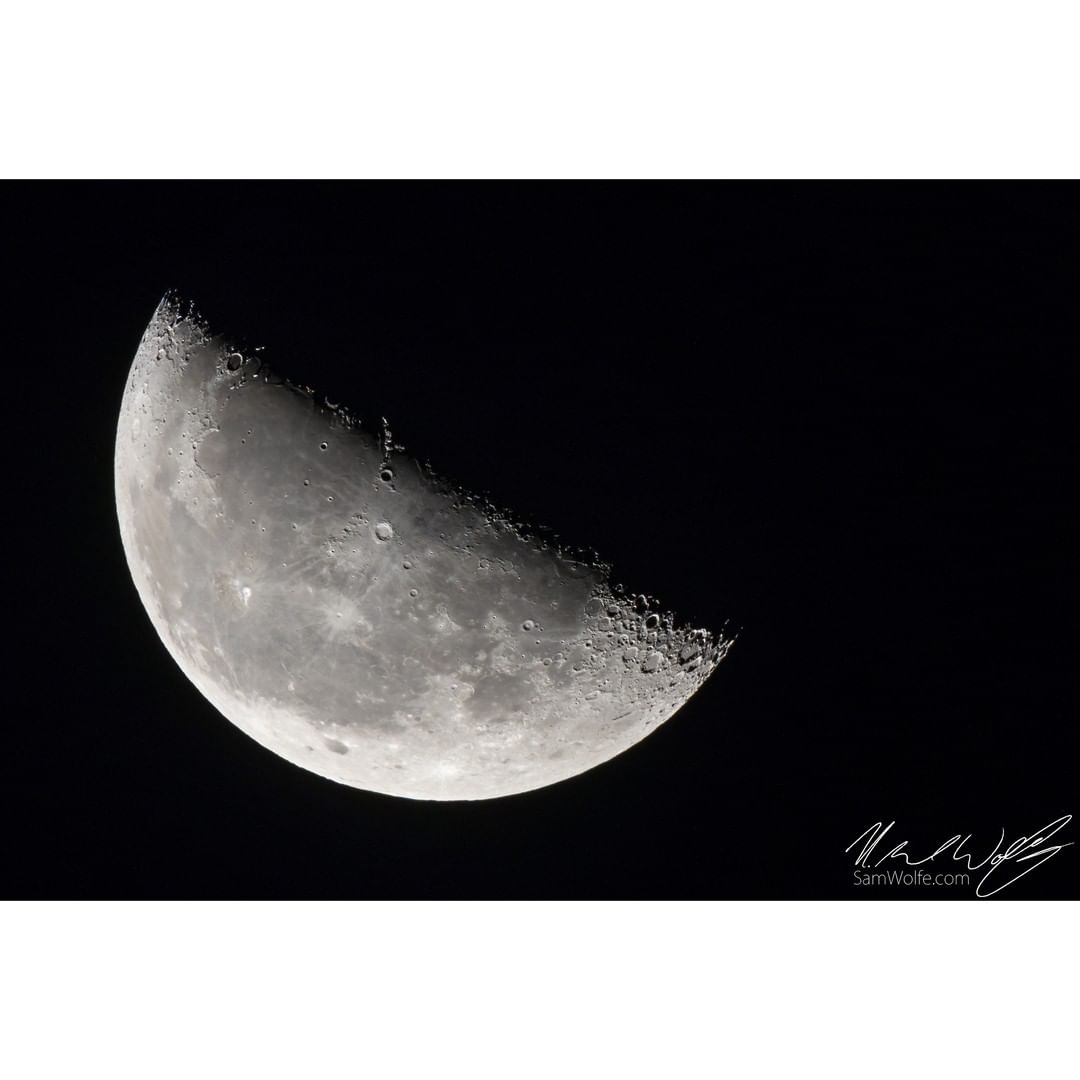
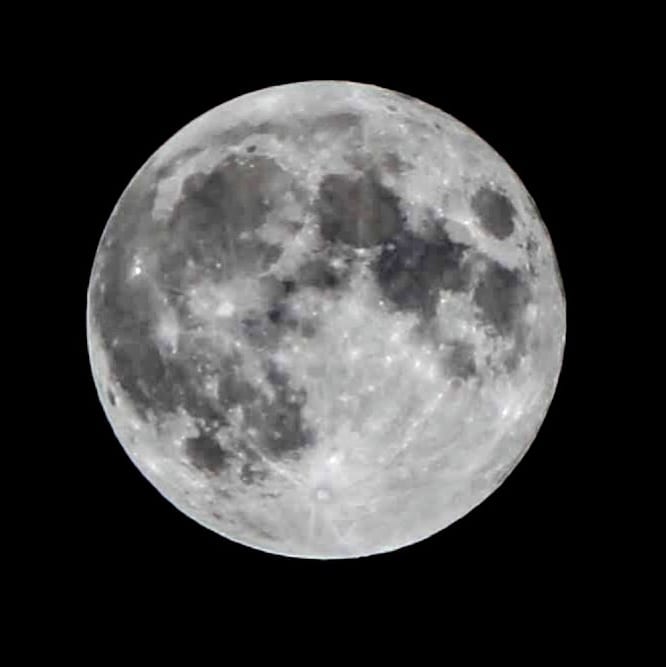
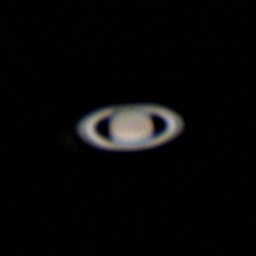
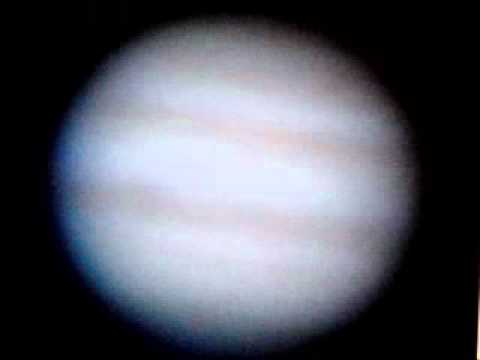
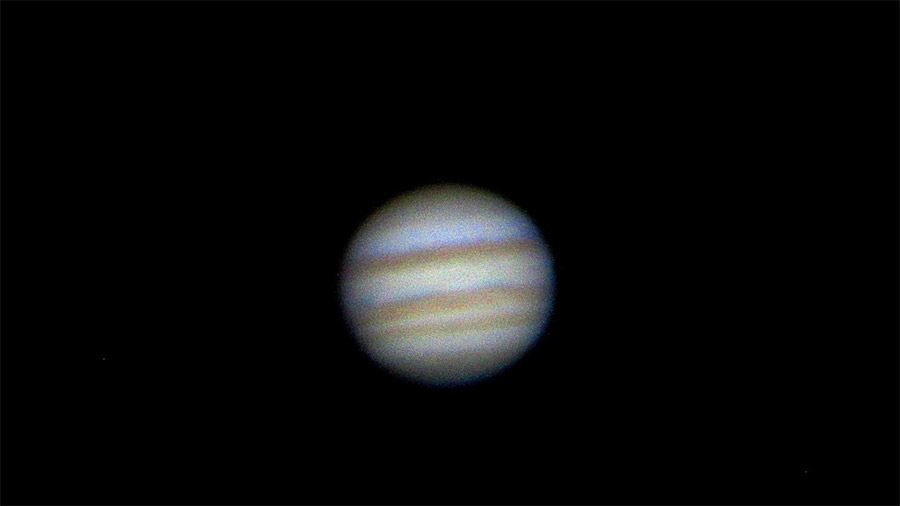
Photos taken with 130mm telescopes
At this aperture you can start to capture some level of detail on Saturn and Jupiter. Nebulas start to look great on photos although to be fair this is not what you will see in the lens, those photos are taken with long shutter speeds and most they are color-corrected.
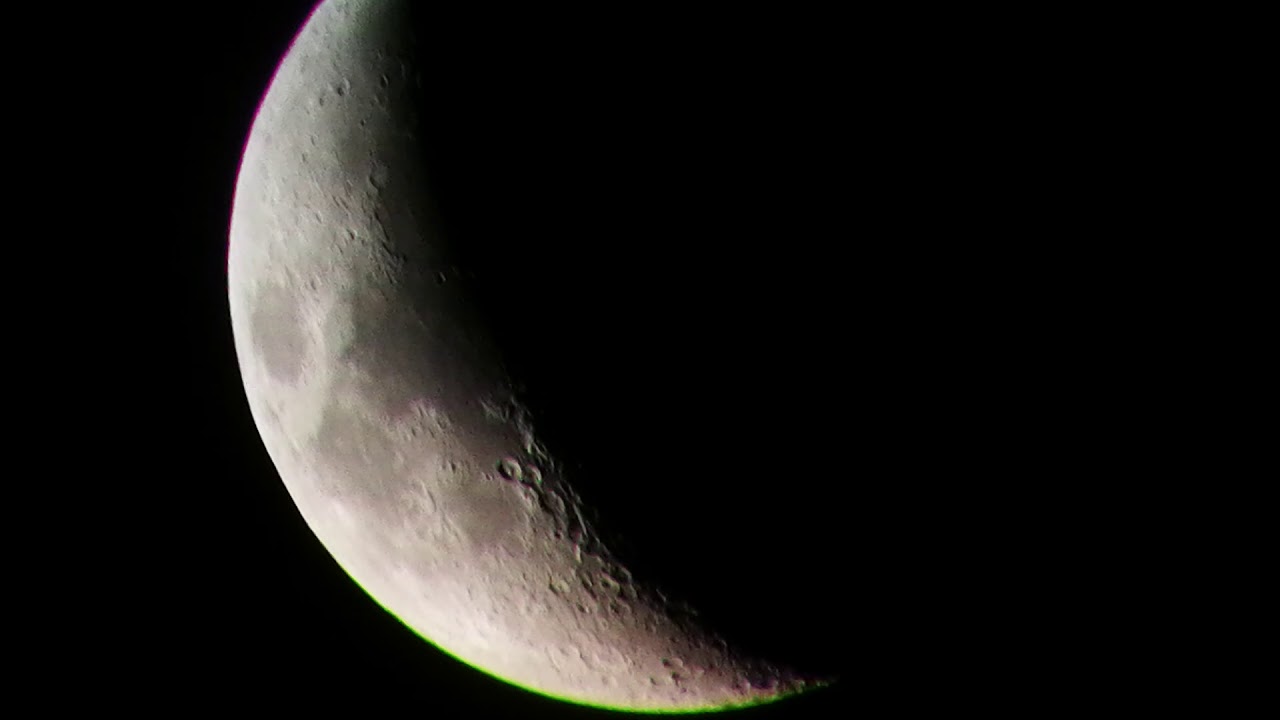
Photos taken with 150mm telescopes
This is what can be considered the high end for beginners because prices start to go up.
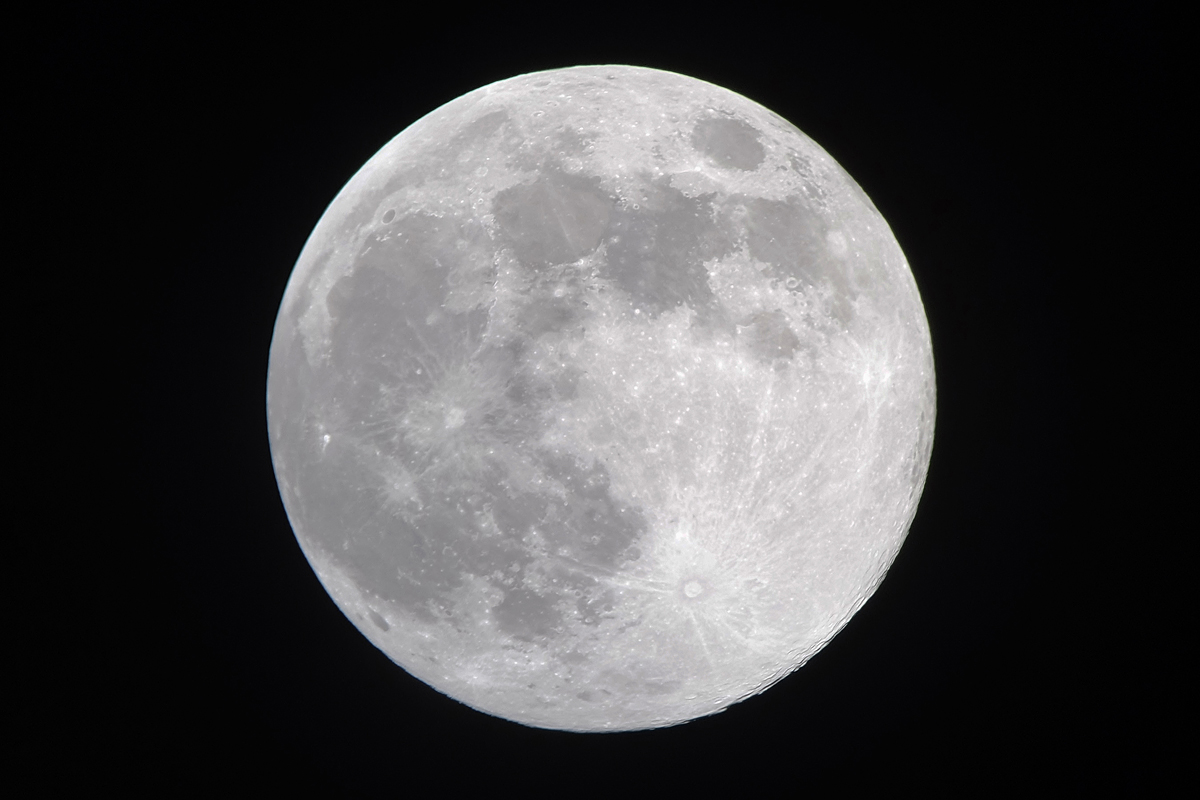
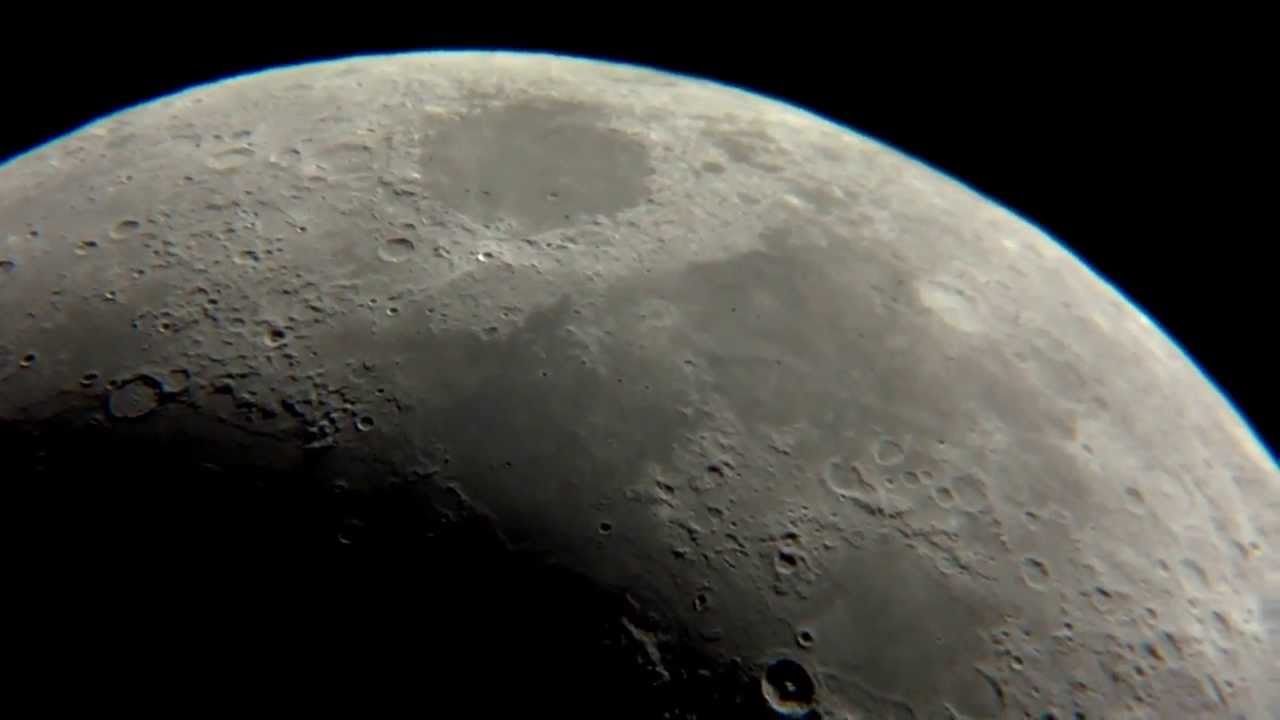
Photos taken with 200mm telescopes
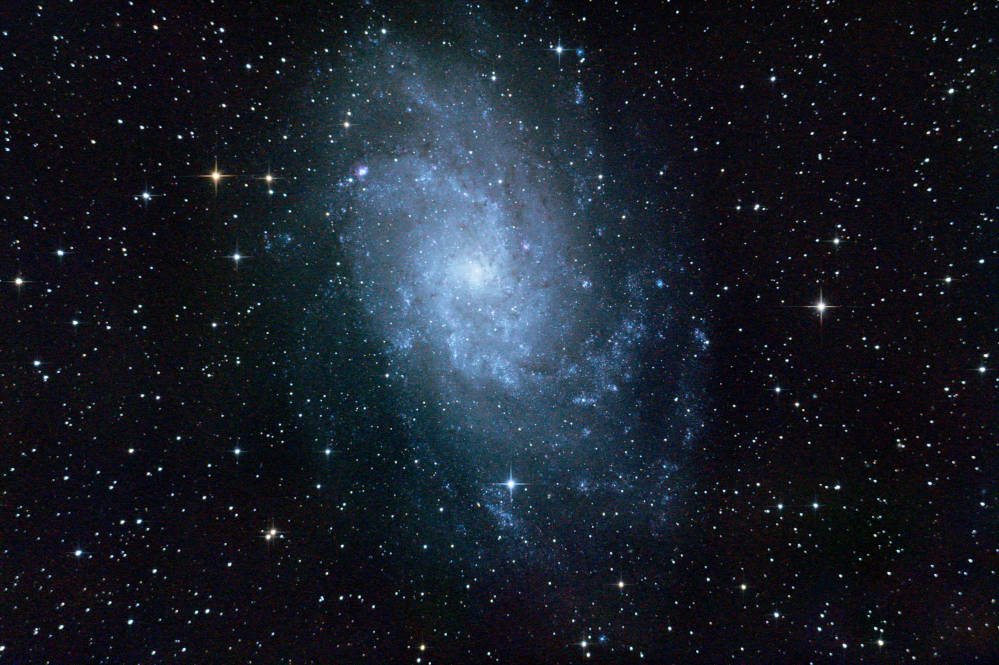
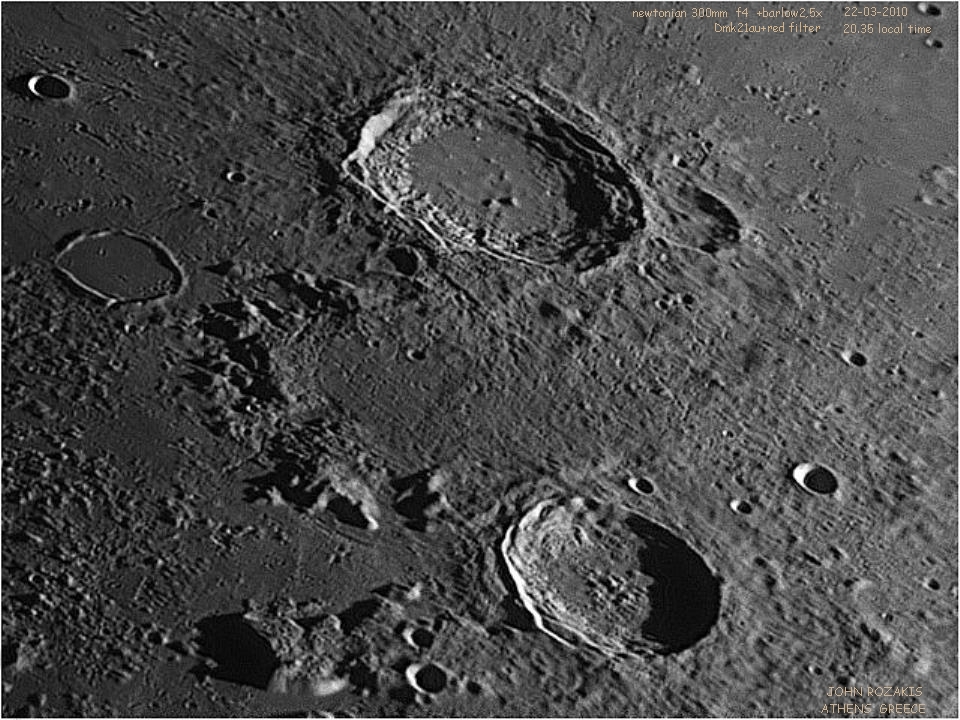
Photos taken with 300mm telescopes
Telescopes with this aperture are already on the expensive and very expensive side, but the results speak for themselves, the photos and images you can get are amazing. Definitely recommended if you have the budget for it.

Enjoyed this article?
Get daily 10-minute PDFs about astronomy to read before bed!
Sign up for our upcoming micro-learning service where you will learn something new about space and beyond every day while winding down.


