
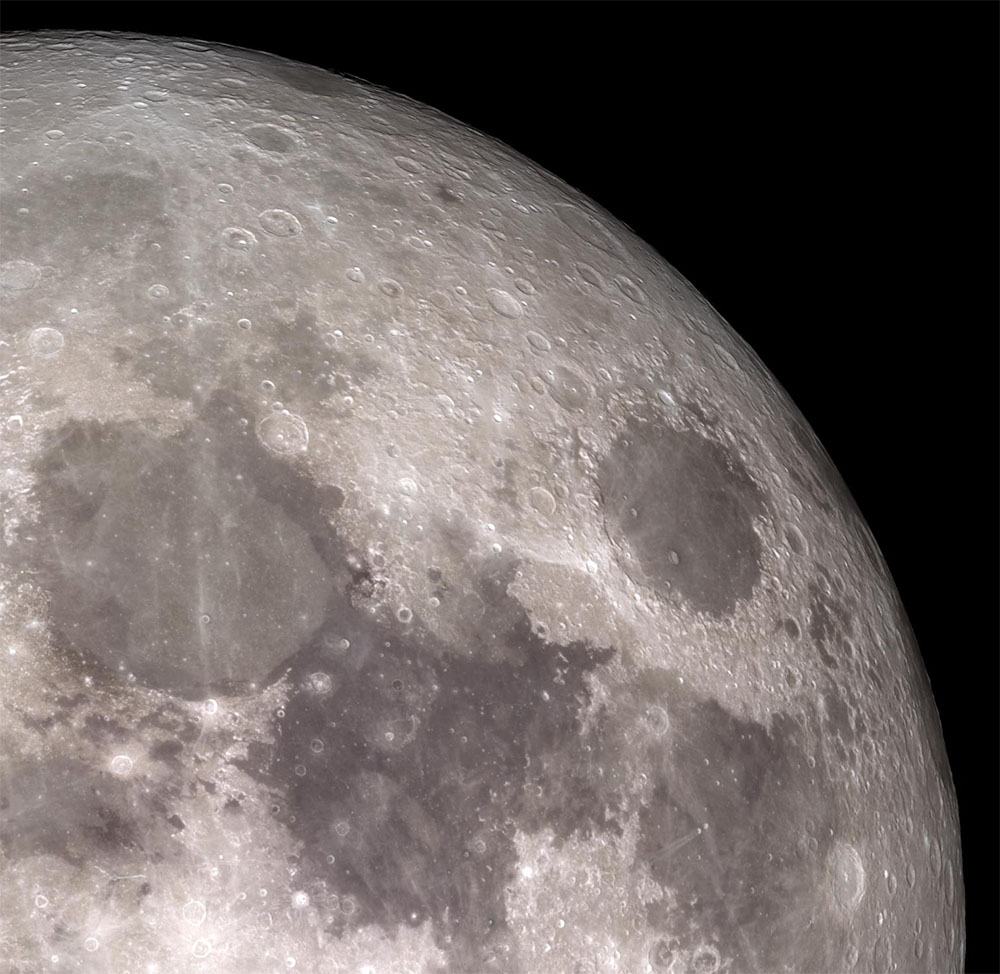
When you are starting out as an amateur stargazer one of the most fun things you can do with a telescope is learning how to take photos of the beautiful celestialobjects you are watching.
The process of using a camera along with your telescope can be a bit tricky if you don’t know what you are doing. Once you learn a
First, let’s define some terms.
What is Astrophotography?
There is a name hobbyists use to refer to the activity of taking photos of space objects and events in the sky such as eclipses or meteor showers. It is called Astrophotography.
Astrophotography is a recent activity, at least in comparison to astronomy. Telescopes have such levels of magnification that the smallest change in their position can take the elements out of focus. Add to that the fact cameras are designed for daylight and you can’t use a flash and you have some big technological challenges that had to be overcome in order to make equipment capable of photographing stars.
Do you need a special type of telescope for astrophotography?
No. You should be able to take photos with pretty much any amateur and professional telescope out there. While there are some modern telescopes with cameras included that you can connect via USB to your laptop or PC, we will focus mostly on attaching a camera to a normal telescope. This gives you more freedom to select your equipment and try different cameras and eyepieces. After some experimentation and learning, this will yield better results and you will be taking much better photos.
Necessary Equipment
- A telescope. Most telescopes will do just fine. Ideally, you want to have one with multiple eyepieces as different objects might look better in one or the other.
- A camera. This will depend on what type of camera you have available to you. Any modern smartphone camera will do just fine. but the better the camera, the better images you can capture. If you have access to a DSLR camera or even a point and shoot, you can use those as well.
- Adapters. This will fully depend on the camera you want to use. These adapters will help you to attach your camera directly on the eyepiece so it remains steady. If you try to simply put your camera on the eyepiece without any help you will quickly find even the slightest hand movements will get you blurry images that will most likely look like unrecognizable smudges. Most adapters are very reasonably priced so you will not need to spend much money on them.
- (optional) A manual exposure app. While the stock photography applications for both iOS and Android are great and do allow you to manually change the setting you will need, they don’t have the best interface for these advanced setting. Some astrophotographers prefer to use third-party apps that have been designed with these options in mind and have easier access to them. Our favorite is Open Camera on Android which is also 100% free. Unfortunately, there is no fully free equivalent option for iOS, but VSCO comes. It offers most features for free and then it has some premium filters and presets that you can pay for.
For the next sections, we are going to assume you already have a telescope and a camera selected. Again, if you are starting out and don’t want to break the bank, any mid-range and above smartphone will be a good start. You can get a professional camera later once you have some experience and want to take the next step up.
Selecting an adapter
Selecting an adapter should be a pretty straightforward choice once you know what camera you are going to be using to take your photos.
Smartphone adapter
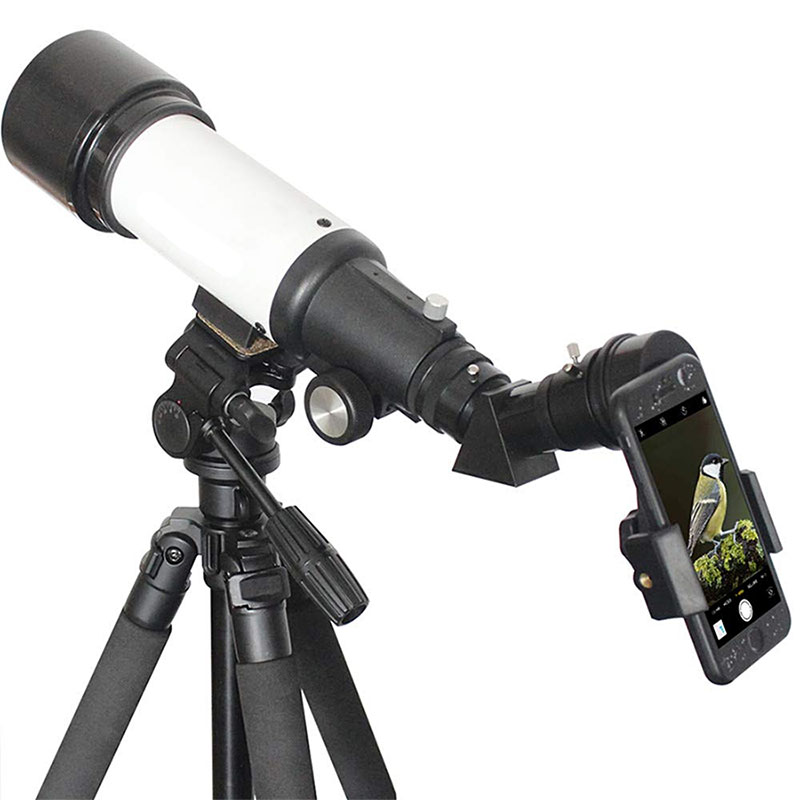
If you have chosen a smartphone as your main camera, you will need an adapter that looks like this:
These universal adapters have an adjustable holder that can expand and contract to fit the width of your phone. They usually go from 50mm to 100mm (2 to 4 inches). For reference, even the biggest phones like the Samsung Note line are only around 76mm wide.
The holder hugs your smartphone safely and allows you to set the camera directly on top of the telescope’s eyepiece. The high-quality models will also have a rotation mechanism and a holder for your eyepiece.
99.9% of telescope eyepieces have a standard size of 1.25″ so you will not need to worry about the adapter not fitting your telescope model.
As for a straight-up recommendation, we like the adapter made by SOLOMARK (View on Amazon). It has all the features you need, it is built with good materials and should last you for a very long time.
The only disadvantage to the SOLOMARK adapter is it is not designed to be used with other optical devices. There are some universal adapters that can also be used to take photos with binoculars or even microscopes. If you want one of those, try the one made by Gosky (View on Amazon). These adapters, in my opinion, are not as well built, but you will get more mileage out of them by being able to use them with other devices.
DSLR Adapters
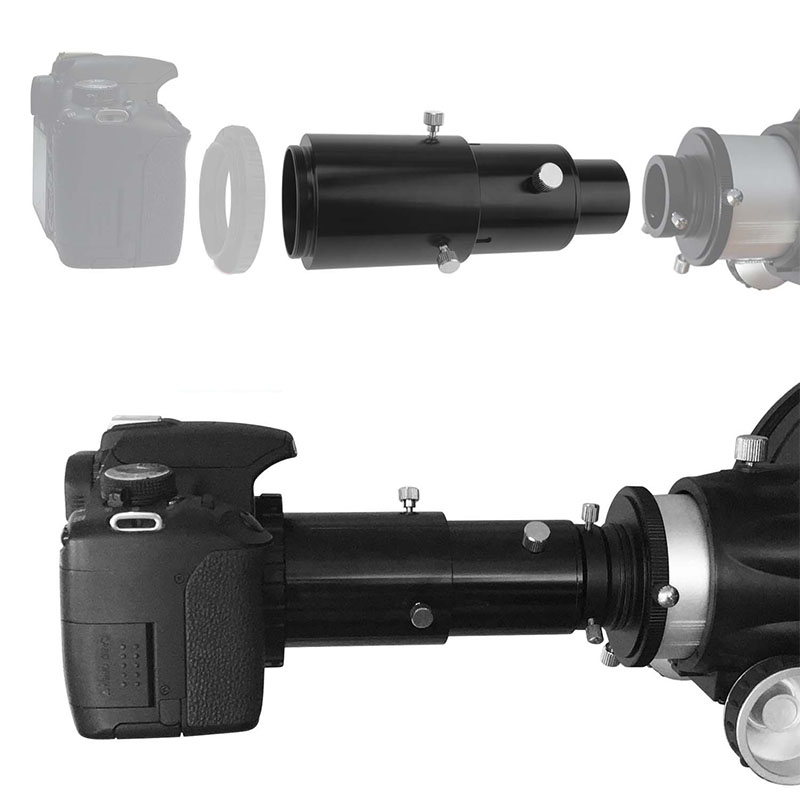
In order to attach your DSLR to your telescope, you will need 2 items.
First, you will need a T-ring. If you have been practicing photography with a DSLR for a long time you might already be familiar with them. It’s an accessory that goes where your lens would normally go and allows you to connect it to other gadgets.
The second item is the actual adapter which is an extender where the eyepiece is introduced and holds your camera directly in front of it.
You can get the adapter and the T-ring separately, but you will most commonly find everything already packed in a kit so you don’t need to worry about compatibility problems. Speaking of compatibility, the rings are brand-specific and will usually be made for one of the two main camera manufacturers (Nikon and Canon). Make sure your kit is made for the brand of your camera. Adapters for other common camera brands like Sony shouldn’t be too hard to find.
Our recommended manufacturer for DLSR adapters is Gosky. Their products are generally well-made and can be found at a reasonable price.
Check out the Gosky Canon adapter on Amazon.
Check out the Gosky Nikon adapter on Amazon
Another brand we like for adapters is Orion. The problem is they are based in Europe and their products can get expensive once you factor in shipping if you are located in the U.S.
Setting up your camera
Connecting your adapter to your telescope should be very straightforward.
For smartphone adapters, you will usually simply set your phone in the arms and adjust the knob until your phone is safely held. Then you will need to align the camera with the hole and connect the other end to the eyepiece and adjust accordingly.
The following video will show you how to connect an Orion adapter. Other brands use very similar devices.
DSLR adapters can be a bit more complicated but not by much. Your adapter will come with the necessary instructions, but it’s not that more complicated than replacing your lens.
The following video shows you the general process of connecting your camera to both a refractor and a Dobsonian telescope. The details might vary depending on your camera but it should be close enough.
Tips and tricks to get better photos
Once you are ready to start taking amazing photos there are some things you will learn with experience that will lead you to take great shots. We will save you some time with the following tips that will make your astrophotography experience much better.
IMPORTANT: Do NOT try to photograph the Sun
Even though all the lenses, the Sun’s light is too bright and it can hurt your eyes permanently. Do not point your telescope directly at the Sun. There are some filters and methods that professional photographers use to takes photos of the Sun safely under certain conditions but that is better left to the pros. Do not try it yourself.
Lower exposure time for planets
This is why you need the manual exposure app we mentioned in the equipment section. Because you will be taking most of your photos at night, your phone’s camera software will get confused with the mostly dark sky and try to increase the exposure. This is especially notorious when trying to photograph planets. High exposure will get you mostly a white smudge and will remove all the color and detail from your photo. Lower the exposure to get better shots.
Exposure time is also referred to as shutter speed.
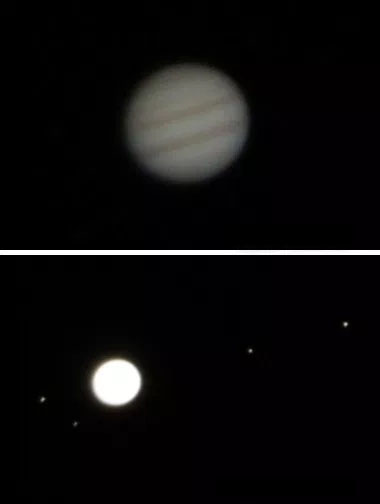
The only caveat to this is that if you are trying to photograph smaller objects that are not as bright you will need the additional exposure. The comparision below shows the difference between a 1/20th of a second photo of Jupiter vs a 1 second exposure. As you can see, the high exposure removes the details in the planet but manages to capture some of its orbiting moons.
Increase exposure time for stars
When you are dealing with dim objects in the sky, a low shutter speed is not ideal as it doesn’t allow for enough light to be captured. Increasing the shutter speed to as much as your camera allows is a great idea particularly when trying to capture stars.
While some cameras will allow you to go crazy with the shutter speed, keep it under 30 seconds. This is about the maximum time you have to take a photo without Earth’s rotation affecting your shot. If you go longer than this, the objects in the photo will move from their position and they will have a trail in the photo.
Set a custom White Balance
If your camera allows for it, experimenting with the White Balance settings will be very helpful. The default white balance settings are created once again for daylight and to capture the color of the sky. Unfortunately, this is bad for taking photos of the objects in the sky, especially when you are somewhere with high levels of light pollution. The background of your photos will have a slight red/yellow tone instead of black. Playing with the white balance can fix this.
Experiment, experiment
Every camera has its own small differences and optimal settings. Because of this, it is difficult to advise on which are the best numbers for each. Part of the fun as a beginner astrophotographer for you will be to experiment with your equipment, get to know it and figure out how to make the most out of it. Always try new things.
Conclusion
We hope this guide has helped you get started with taking photos with your telescope. It is a very enjoyable and rewarding hobby that you can share with your family, friends or significant other. If you have any questions leave a comment below and we will try to answer them.
Enjoyed this article?
Get daily 10-minute PDFs about astronomy to read before bed!
Sign up for our upcoming micro-learning service where you will learn something new about space and beyond every day while winding down.


