
I recently posted an article talking about my recommendations for telescope covers, and a friend on Twitter asked why I hadn’t included a section on DIY covers. Many people prefer to make their own or are looking for a more affordable solution so they can spend their money on a brand new eyepiece or something else. Telescope covers don’t have much science behind them so it’s very reasonable for anyone to try and make one themselves.
Making a DIY telescope cover is way easier than you’d think. The materials are cheap, easy to get, and you don’t even need to be a crafts kind of person. If you want to get fancy, some sewing skills can be helpful, but they are not necessary.
People use all kinds of methods to cover their telescopes. From old sheets to trash bags, and while those will protect it from the dust, they can end up hurting the telescope more than they help. For example, those big plastic bags are generally black and are not reflective, so they build up a lot of heat that can weaken the optics glue.
Let’s start from the beginning.
What’s a telescope cover?
Telescope covers are used to protect your telescope from its mortal enemies while it’s not in use: dust, heat, water, and sunlight.
They are basically big blankets or bags that cover the telescope’s tube, mirrors, and mechanical/electrical parts.
Good covers need to have the following features:
- Waterproofing. Or at the very least they need to be water-resistant. Protecting the optics from accidental water is essential to keep a telescope in good shape for a long time. Moisture, dew, rain, and any other type of accidental liquids, can leave spots in the lenses if its not properly dried. The need for waterproofing increases if you have a computarized mount with electrical parts that can short-circuit if they are exposed to water.
- Sunlight reflection. Why would the Sun hurt a telescope? Well, it’s the heat that’s really the issue. When you cover a telescope with a fabric that does not disperse or reflect sunlight, heat starts to build up inside. This can slightly loosen up the mirrors, causing a misalignment that results in optical errors.
- Dust protection. This is self-explanatory. You don’t want dust in your mirrors because everytime you clean you run the risk of scratches.
What are telescope covers made out of?
In order to understand how we are going to make our DIY cover, we need to know what the covers are made of.
It’s really simple.
The inner fabric is a regular waterproof cloth, like the kind used for tablecloths. It should preferably be breathable and they are generally made out of polyester. The premium covers are double or triple-layered.
The outer silver layer that looks all shiny and reflective is aluminized mylar. This is the important part and it’s the material that is going to help reflect sunlight and thermally stabilize the interior to keep the telescope cool. It’s the same material that is used in camping and outdoors gear except in that case it is used in the inner layers to keep the heat in instead of out.
How to make you own telescope cover
Method 1: The simple, but fragile cover. Indoors only.
As you can tell from the explanation of the materials above, all you need as a cover for your telescope is really a layer of aluminized mylar.
Thankfully, that’s super easy to get.
Big sheets of the exact coating we need are already sold under the name of “space blankets”. They are just called that because of how they look. They are used as emergency thermal blankets by campers or rescue services.
The best part? They are incredibly cheap. You can get a pack of 4 like this one for a very small fraction of what a telescope cover costs.
These generally come in a standard size of 82″ x 52″ (2.1m x 1.3m) which is enough to fit any refractor, Newtonian, or Cassegrain.
To hold everything together, simply use an adjustable strap buckle like this or any other type of adjustable rope-like in the photo.
The end result might end up looking like this:
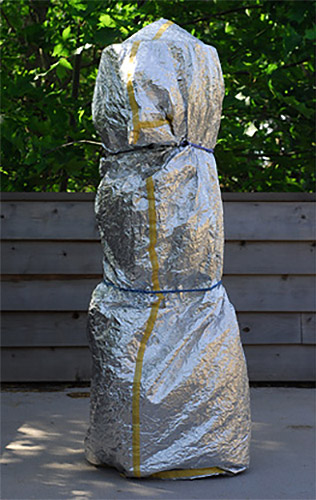
Not too pretty, but hey, it works. At least partially.
The disadvantages of this method are two.
First, the blankets are thin and they are not tear-resistant. Expect to have to go through a couple every few months. Thankfully at the price you can get them, it’s ok if they are almost disposable.
Second. While this solves the heat, wind, and dust issue, it does nothing against water. Space blankets are not waterproof. You can’t use this method if there’s any chance of rain or water risk, so I’d only recommend it strictly for indoor use or maybe to leave your telescope outside for a night or two when you are absolutely positive it won’t rain.
Method 2: The true DIY telescope cover
If you are looking for something more durable and that can actually withstand water, here’s another option.
We are going to need a waterproof material that we can stitch a layer of mylar to. If you really want to build that from scratch, go for it, tarp or a polyester tablecloth will do the job, however, this step has already been done for us so I’d recommend you to skip it, again, to our good friends in the outdoors survival industry.
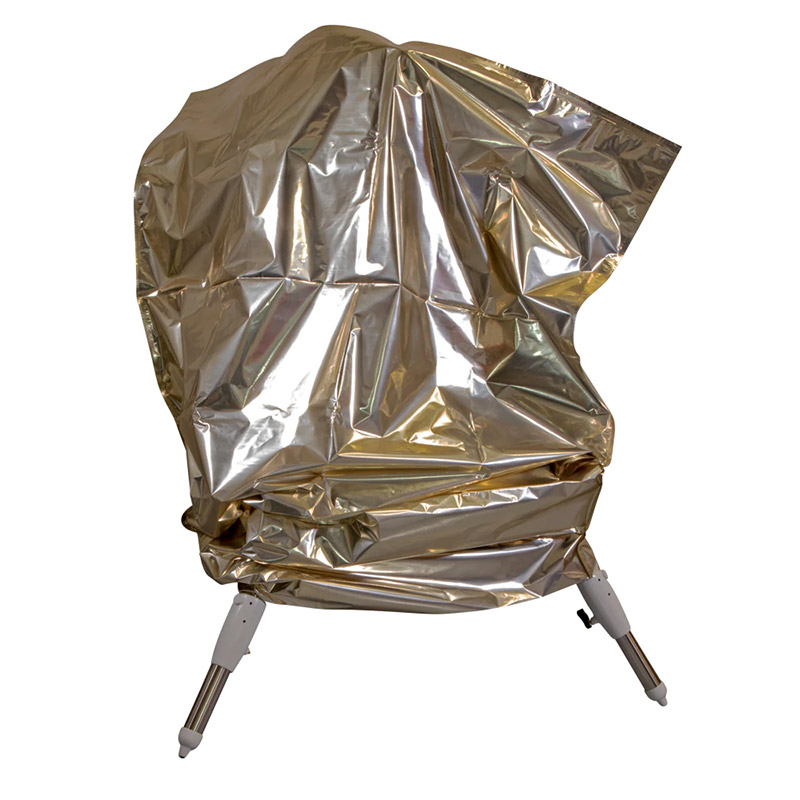
They have made survival blankets like this one and the one shown in the picture. These are a big sheet of the material we want and the best part is that, unlike the commercial telescope covers, these are not much more expensive than getting the raw materials.
The next and last step to turning this sheet into a true telescope cover will require some sewing.
Fold the sheet by the shorter or larger side, depending on the size of your telescope. Make sure to leave the reflective side on the outside.
Stitch or sew both of those halves together by the side. This will create a bag with only one side open which is the one you will put over your scope.
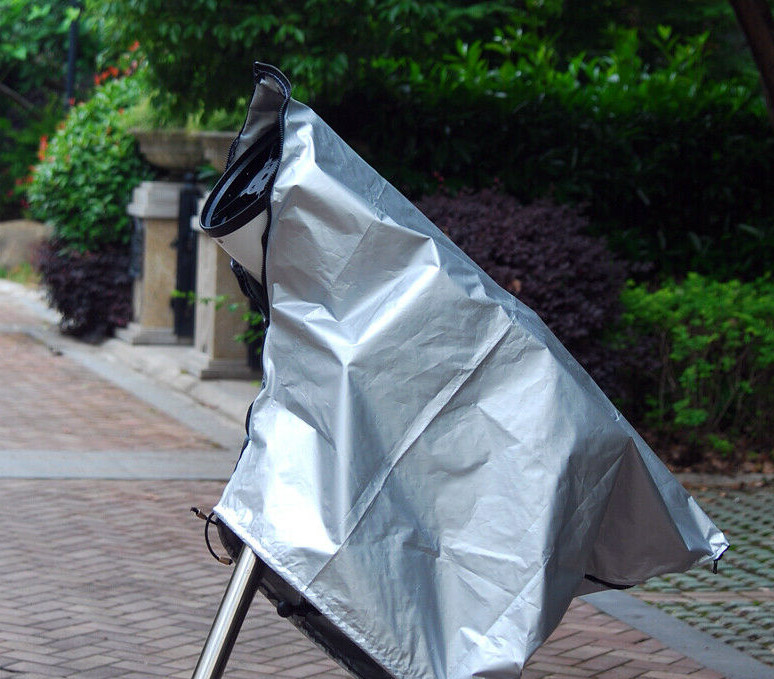
If you are skilled with a sewing machine, you can add zippers to both sides. This will allow you to use the telescope while using the cover like the photo below.
Please note that even if you are using waterproof covers, I still don’t recommend leaving your telescope outside permanently. Try to find a nice place for it indoors when you are not using it.
To close the cover on the bottom, again, simply add an adjustable strap or some other kind of elastic. Or even better, if you went with the blanket I linked above, it already comes with holes on the edges and corners where you can conveniently pass an elastic cord through.
That’s it! Now you have a fully functional telescope cover. Your cover should end up looking something like this:
Summary
- Telescope covers use waterproof fabric and aluminized mylar
- All the materials to make one can be bought for cheap
- It’s not too hard to make a telescope cover if you want to save some money
Enjoyed this article?
Get daily 10-minute PDFs about astronomy to read before bed!
Sign up for our upcoming micro-learning service where you will learn something new about space and beyond every day while winding down.


 for a complete collection")


